Showing posts with label tutorials. Show all posts

Thursday, September 14, 2023

10 DIY Tutorials to Make Your Own Home Decor

September 14, 2023 0 Comments
Are you tired of the same old home decor? Do you want to add a personal touch to your living space without breaking the bank? Look no further than these 10 DIY tutorials to make your own home decor.

1. Rustic Wooden Shelf

Bring a touch of nature into your home with this easy-to-make rustic wooden shelf. All you need is a piece of wood, some rope, and a few screws. Hang it on your wall to display plants, books, or trinkets.

2. Macrame Wall Hanging

Macrame has been making a comeback in recent years, and for good reason. It's a simple and beautiful way to create wall hangings, plant hangers, and more. Follow this tutorial to make your own stunning macrame wall hanging.

3. Painted Terra Cotta Pots

Transform plain terra cotta pots into works of art with just a few coats of paint. Use stencils or freehand your designs for a unique touch. These pots are perfect for displaying your favorite plants or herbs.

4. Mosaic Mirror

Add some sparkle to your home with a DIY mosaic mirror. Use broken glass, tiles, or even seashells to create a one-of-a-kind piece. This tutorial walks you through the process step-by-step.

5. Photo Clipboards

Display your favorite photos in a unique way with these DIY photo clipboards. All you need is some wood, clips, and your favorite pictures. Hang them on your wall for a personalized gallery.

6. Fabric Covered Bulletin Board

Keep your life organized with a fabric covered bulletin board. Choose a fabric that complements your decor and use it to cover a plain cork board. Use push pins to display notes, pictures, and reminders.

7. Painted Wooden Utensils

Add some color to your kitchen with these painted wooden utensils. Use food-safe paint to create a fun and functional set of spoons, spatulas, and more.

8. Yarn Wall Art

Create a cozy and textured look with this DIY yarn wall art. Choose your favorite colors and create a simple design with yarn and a wooden dowel.

9. Chalkboard Sign

Make your own customizable chalkboard sign for your home or events. Use a piece of wood, chalkboard paint, and some chalk to create a sign that can be changed as often as you like.

10. Painted Wooden Crate

Use a wooden crate as a versatile storage solution in your home. Paint it in your favorite colors and use it to store books, blankets, or anything else you need to keep organized.With these 10 DIY tutorials, you can add a personal and creative touch to your home decor. Have fun and let your imagination run wild!

Saturday, September 9, 2023

The Ultimate DIY Tutorial Guide for Crafting Enthusiasts

September 09, 2023 0 Comments
Are you someone who enjoys creating unique and personalized crafts? Maybe you’re looking for a new hobby to try out, or perhaps you’re an experienced crafter looking to expand your skills. Whatever your level of expertise may be, this DIY tutorial guide is the perfect resource for anyone who loves crafting.

Gather Your Supplies

Before you get started with any crafting project, it’s important to gather all of the necessary supplies. Depending on what you’re creating, this may include things like glue, scissors, paint, markers, fabric, yarn, and more. Consider creating a checklist of everything you need to ensure you don’t forget anything important.

Choose Your Project

Once you have all of your supplies ready, it’s time to choose a project to work on. There are countless DIY crafting tutorials available online, so take some time to browse through different options and find something that appeals to you. Whether you’re interested in knitting, sewing, painting, or something else entirely, there’s sure to be a tutorial out there that will inspire you.

Follow the Tutorial

Now that you’ve chosen your project, it’s time to follow the tutorial. Make sure to read through all of the instructions carefully before getting started, and don’t hesitate to reach out for help if you get stuck. Remember to take your time and enjoy the process – crafting is all about creativity and self-expression, so don’t worry too much about making everything perfect.

Get Creative

Once you’ve completed your project, it’s time to get creative with it. Whether you’re displaying it in your home, giving it as a gift, or using it for personal use, there are plenty of ways to make your creation even more unique. Consider adding embellishments like buttons or sequins, or experimenting with different colors or patterns.

Share Your Creations

Finally, don’t forget to share your creations with others. Whether you post photos on social media or participate in local crafting groups or events, sharing your work with others is a great way to connect with like-minded individuals and get feedback on your projects. Plus, it’s always fun to show off your hard work and creativity!In conclusion, crafting is a wonderful hobby that allows for endless creativity and self-expression. Whether you’re a beginner or an experienced crafter, this DIY tutorial guide is the perfect resource for anyone looking to create something unique and personalized. So gather your supplies, choose your project, and let your creativity run wild!

Monday, August 21, 2023

DIY Tutorials: Get Creative with These Unique Scrapbooking Ideas

August 21, 2023 0 Comments
Scrapbooking is a fun and creative way to preserve memories and tell stories. It's a hobby that many people enjoy, and it's easy to see why. Scrapbooking allows you to showcase your creativity, and it's a great way to personalize your memories. If you're looking for some unique scrapbooking ideas, then you're in the right place. In this article, we'll explore some DIY tutorials that will help you get creative with your scrapbooking.

1. Use Unconventional Materials

One way to get creative with your scrapbooking is to use unconventional materials. For example, you can use fabric scraps, buttons, and ribbon to add texture and dimension to your pages. You can also use old maps, sheet music, and book pages as background paper. These materials add a unique touch to your scrapbook and make it stand out.

2. Create Interactive Pages

Interactive pages are a great way to add an element of surprise to your scrapbook. You can create pages with flaps, pockets, and envelopes that hold hidden messages or photos. You can also create pages with pull tabs and sliders that reveal additional content. These interactive pages are a fun way to engage your audience and make your scrapbook more memorable.

3. Incorporate Handlettering

Handlettering is a popular trend in scrapbooking, and it's easy to see why. It adds a personal touch to your pages and allows you to showcase your handwriting skills. You can use a variety of pens and markers to create different styles of lettering, from bold and dramatic to elegant and cursive. Handlettering is a versatile technique that can be used in a variety of ways, including titles, quotes, and captions.

4. Create a Mini Album

A mini album is a small scrapbook that focuses on a specific theme or event. It's a great way to showcase a collection of photos or tell a story in a compact format. You can create a mini album using a variety of materials, including cardstock, patterned paper, and chipboard. You can also add embellishments, such as stickers, die-cuts, and ribbon, to add interest and texture to your pages.

5. Use Sketches and Templates

If you're short on time or creativity, then using sketches and templates is a great way to get started. Sketches are pre-designed layouts that you can use as a guide for your pages. Templates are pre-cut shapes and designs that you can use to create your own embellishments and accents. These tools are a great way to jumpstart your creativity and get your scrapbooking project off the ground.In conclusion, scrapbooking is a fun and creative hobby that allows you to showcase your memories and tell your story. By using unconventional materials, creating interactive pages, incorporating handlettering, creating a mini album, and using sketches and templates, you can get creative with your scrapbooking and make your project stand out. So, grab your supplies and get started on your next scrapbooking adventure!

Saturday, July 15, 2023

7 DIY Furniture Tutorials That Will Inspire Your Next Home Project

July 15, 2023 0 Comments
Are you looking for some inspiration for your next DIY furniture project? Look no further than these 7 tutorials that will guide you through the process of creating unique and stylish furniture pieces for your home.

1. Upcycled Pallet Coffee Table

If you're looking for a rustic and eco-friendly addition to your living room, try making a coffee table out of upcycled pallets. This tutorial from 1001 Palletsprovides step-by-step instructions and a list of necessary materials. The end result is a functional and affordable piece of furniture.

2. Mid-Century Modern Dresser

If you're a fan of the sleek and retro design of mid-century modern furniture, try making this DIY dresser from The Spruce Crafts. This tutorial includes detailed instructions and a list of materials, as well as tips for achieving the perfect finish.

3. Floating Shelves

Floating shelves are a versatile and stylish addition to any room in your home. This tutorial from DIY Networkprovides step-by-step instructions for creating your own floating shelves using basic tools and materials.

4. Farmhouse Dining Table

If you're looking for a statement piece for your dining room, try making this farmhouse-style table from Ana White. This tutorial includes detailed plans and instructions, as well as tips for customizing the size and style of your table.

5. Bookshelf with Built-In Desk

If you're short on space but need a functional workspace, try making this bookshelf with a built-in desk from HGTV. This tutorial includes step-by-step instructions and a list of materials, as well as tips for finishing and styling your bookshelf.

6. Upholstered Headboard

If you want to add a touch of luxury to your bedroom, try making an upholstered headboard using this tutorial from The Spruce Crafts. This tutorial includes detailed instructions and a list of materials, as well as tips for choosing the right fabric and foam.

7. Industrial Pipe Shelving

For a unique and industrial look, try making these pipe shelves from The DIY Playbook. This tutorial includes step-by-step instructions and a list of materials, as well as tips for customizing the size and style of your shelves.No matter what your skill level or design preferences, these DIY furniture tutorials are sure to inspire your next home project.

Thursday, May 18, 2023

DIY Tutorials: Learn to Crochet Your Own Winter Accessories

May 18, 2023 0 Comments
Are you tired of buying expensive winter accessories every year? Why not try making your own? Crocheting is an easy and fun activity that can help you create beautiful and cozy winter accessories. In this DIY tutorial, we will guide you through the process of crocheting your own winter accessories.

What You Will Need

To get started, you will need a few basic supplies. First, you will need a crochet hook. The size of the hook will depend on the type of yarn you are using. You will also need yarn in the color and weight of your choice. Finally, you will need a pair of scissors and a yarn needle.

Step 1: Choose Your Project

There are many different winter accessories that you can crochet, including hats, scarves, gloves, and mittens. Choose a project that you are comfortable with and that matches your skill level. If you are new to crocheting, start with a simple project like a hat or scarf.

Step 2: Start Crocheting

Once you have chosen your project, it's time to start crocheting. Follow the instructions for your chosen pattern, or create your own. Remember to keep your tension even and consistent to ensure that your stitches are neat and tidy.

Step 3: Add Some Personality

Now that your winter accessory is taking shape, it's time to add some personality. You can add pom-poms, tassels, or buttons to your hat or scarf. Get creative and make your winter accessory truly unique.

Step 4: Finishing Touches

Once you have completed your winter accessory, it's time to add the finishing touches. Weave in any loose ends using a yarn needle. If you have made a hat or scarf, you may also want to block it to ensure that it retains its shape.

Step 5: Enjoy Your Creation

Congratulations! You have successfully crocheted your own winter accessory. Now it's time to show it off and enjoy it. Wear your new hat or scarf with pride and stay warm and cozy all winter long.Crocheting your own winter accessories can be a fun and rewarding experience. Not only do you get to create something unique and personalized, but you also save money by not having to buy expensive accessories. So why not give crocheting a try this winter season?

Friday, May 12, 2023

DIY Crafts on a Budget: How to Save Money and Still Get Creative

May 12, 2023 0 Comments
Do you love DIY crafts, but find yourself hesitant to start due to the cost of materials? Don't worry, you're not alone. Fortunately, there are ways to create beautiful and unique crafts without breaking the bank. In this article, we will explore some tips and tricks to help you save money while still getting creative.

1. Upcycle and Repurpose

One of the best ways to save money on DIY crafts is to upcycle and repurpose materials you already have. Before throwing out old clothes, jars, or other items, think about how you can use them in your crafts. For example, an old t-shirt can be turned into a tote bag, or a mason jar can be transformed into a candle holder. Not only does this save money, but it's also environmentally friendly.

2. Shop Secondhand

Another way to save money is to shop at secondhand stores or garage sales for materials. You can often find unique items at a fraction of the cost of buying new. Look for things like picture frames, fabric, and even furniture that can be repurposed into something new and beautiful.

3. Use Coupons and Sales

When shopping for materials, always keep an eye out for coupons and sales. Craft stores like Michaels and Joann Fabrics regularly offer discounts and coupons that can save you a significant amount of money. You can also sign up for their email newsletters to receive notifications of upcoming sales and discounts.

4. DIY Your Own Materials

Instead of buying expensive materials, consider making your own. For example, you can make your own paint by mixing flour, salt, and food coloring. Or, you can create your own stamps using potatoes or other household items. Not only is this a great way to save money, but it's also a fun and creative process.

5. Look for Free Patterns and Tutorials

Finally, when starting a new project, look for free patterns and tutorials online. Websites like Pinterest and YouTube offer a plethora of free resources for all types of crafts. You can also join online communities and forums to connect with other DIY enthusiasts and share ideas and tips.In conclusion, DIY crafts don't have to be expensive. With a little creativity and resourcefulness, you can save money and still create beautiful and unique projects. Remember to upcycle and repurpose materials, shop secondhand, use coupons and sales, DIY your own materials, and look for free patterns and tutorials online. Happy crafting!

Tuesday, April 18, 2023

Upcycling 101: DIY Tutorials for Repurposing Old Furniture

April 18, 2023 0 Comments
Do you have old furniture lying around your house that you no longer have any use for? Instead of throwing it away, why not try upcycling it? Upcycling is the process of repurposing old or unwanted items into something new and useful. In this article, we'll provide you with some DIY tutorials for upcycling old furniture.

1. Turn a Dresser into a Kitchen Island

If you have an old dresser that you no longer need, you can easily turn it into a kitchen island. First, remove the drawers and any hardware from the dresser. Then, sand the surface and add a fresh coat of paint. Finally, add a countertop to the top of the dresser and voila! You now have a brand new kitchen island.

2. Create a Bench from an Old Headboard

If you have an old headboard that you no longer use, why not turn it into a bench? First, remove any hardware from the headboard. Then, cut the headboard in half and attach wooden slats to create the seat. Finally, add a fresh coat of paint to the bench and you'll have a unique piece of furniture.

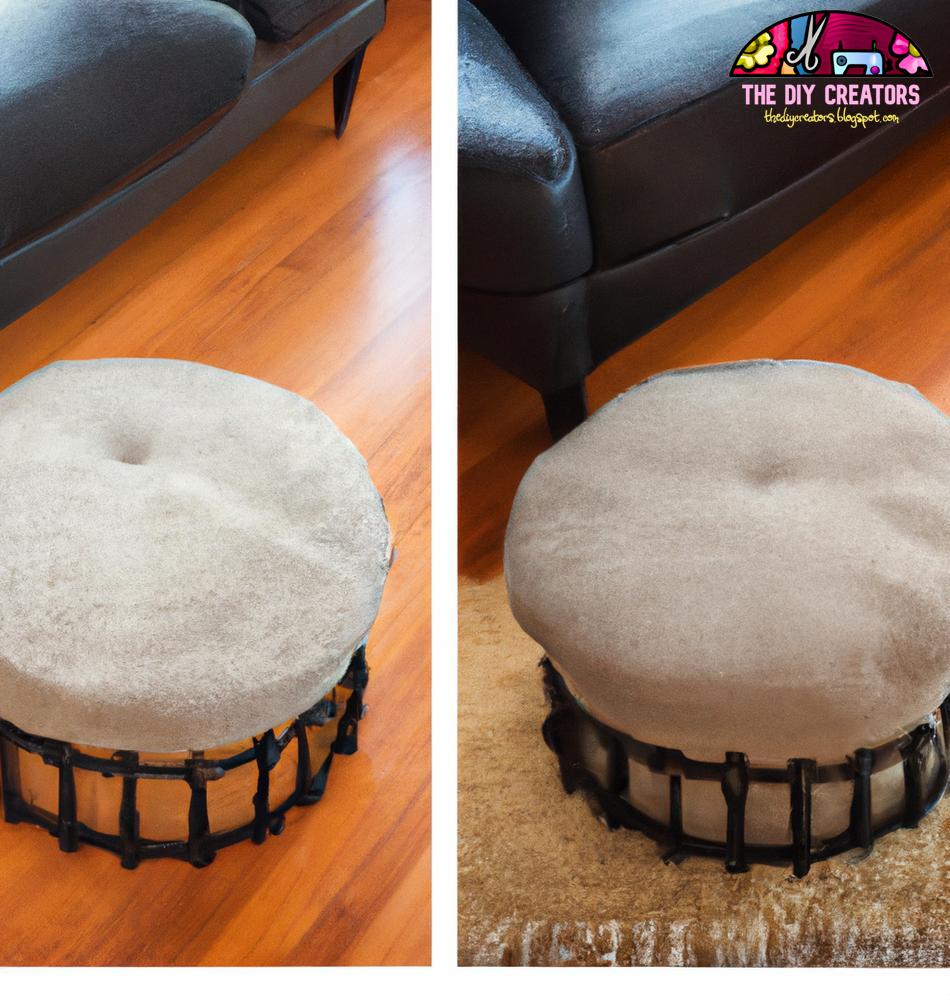
3. Repurpose a Coffee Table into a Ottoman

If you have an old coffee table that you no longer use, you can easily turn it into an ottoman. First, remove any hardware from the coffee table. Then, add foam padding to the top of the table and cover it with a fabric of your choice. Finally, add wooden legs to the bottom of the table and you now have a brand new ottoman.

4. Transform a Dresser into a TV Stand

If you have an old dresser that you no longer need, you can easily transform it into a TV stand. First, remove any hardware from the dresser. Then, add a fresh coat of paint and drill a hole in the back of the dresser for cords. Finally, add some decorative knobs and you have yourself a unique TV stand.

5. Create a Bookshelf from an Old Ladder

If you have an old ladder lying around, why not turn it into a bookshelf? First, sand the ladder and add a fresh coat of paint. Then, attach wooden planks to the steps of the ladder to create shelves. Finally, secure the ladder to the wall and you now have a unique bookshelf.In conclusion, upcycling old furniture is a great way to give new life to items that would otherwise end up in a landfill. With these DIY tutorials, you can easily transform your old furniture into unique and useful pieces. So next time you're thinking of throwing something away, think again and consider upcycling it instead.

Friday, March 24, 2023

DIY Tutorials: Master the Art of Calligraphy

March 24, 2023 0 Comments
If you've ever admired the beautiful, flowing script of calligraphy and wished you could do it yourself, you're in luck! With some basic tools and a little bit of practice, anyone can become a skilled calligrapher. In this DIY tutorial, we'll show you how to get started with calligraphy and master the art.

Tools You'll Need

The first step to becoming a calligrapher is to gather the necessary tools. Here are the basics:- Calligraphy pen or brush: There are many different types of calligraphy pens and brushes to choose from. Some popular options include the dip pen, which requires dipping the pen into ink, and the brush pen, which has a built-in ink reservoir.- Ink: You'll need a high-quality ink that won't smudge or bleed. Black ink is the most traditional option, but you can also experiment with colored inks.- Paper: Look for a smooth, high-quality paper that won't bleed or feather. You can use traditional calligraphy paper, or try out different types of paper to see what works best for you.- Ruler: A ruler will help you create straight guidelines for your calligraphy.- Eraser: You'll want to have an eraser handy in case you make any mistakes.

Basic Calligraphy Techniques

Now that you have your tools, it's time to start practicing! Here are some basic calligraphy techniques to get you started:- Hold your pen or brush at a 45-degree angle: This will allow the ink to flow smoothly onto the paper.- Use light pressure for upstrokes, and heavy pressure for downstrokes: This will create the signature thick and thin lines of calligraphy.- Practice your strokes: Mastering basic strokes like the upstroke and downstroke will help you build the muscle memory you need to create beautiful calligraphy.

Calligraphy Styles

There are many different styles of calligraphy to choose from, each with its own unique look and feel. Here are a few popular styles:- Copperplate: This elegant style is characterized by its thin upstrokes and thick downstrokes.- Gothic: Gothic calligraphy is known for its bold, dramatic strokes and intricate details.- Italic: Italic calligraphy is a more modern style that features a slanted, cursive look.

Creating Your Own Calligraphy Project

Once you've practiced your basic techniques and chosen a calligraphy style, it's time to create your own project! Here are some ideas to get you started:- Address envelopes: Add a touch of elegance to your next batch of mail by addressing the envelopes in calligraphy.- Create a quote or poem: Choose your favorite quote or poem and write it out in calligraphy, then frame it and display it in your home.- Make place cards: Impress your dinner guests by creating beautiful calligraphy place cards for your next dinner party.

Tips for Success

- Be patient: Calligraphy takes time and practice to master, so don't get discouraged if your first attempts don't turn out perfectly.- Practice regularly: Set aside time each day to practice your calligraphy skills and build your muscle memory.- Experiment with different tools and styles: Don't be afraid to try out different pens, inks, and styles to find what works best for you.With these tips and techniques, you'll be well on your way to mastering the art of calligraphy. Happy writing!

Tuesday, February 21, 2023

5 Creative DIY Tutorials for Upcycling Old Furniture

February 21, 2023 0 Comments
If you have old furniture lying around your home that you no longer want, don't throw it away just yet. Upcycling is a great way to breathe new life into your old furniture and give it a new purpose. Not only is it environmentally friendly, but upcycling can also save you money while giving you a unique piece of furniture. Here are 5 creative DIY tutorials for upcycling old furniture.

1. Turn a Dresser into a TV Stand

If you have an old dresser that you no longer need, why not turn it into a TV stand? All you need is some paint, sandpaper, and a few tools to transform your old dresser into a new and functional piece of furniture. First, remove the drawers and sand the dresser down to remove any rough spots. Then, paint the dresser in the color of your choice and let it dry. Finally, reattach the drawers and add any finishing touches, such as new knobs or handles. Use the top of the dresser to hold your TV and any other electronics.

2. Repurpose a Headboard into a Bench

If you have an old headboard that you no longer need, consider turning it into a bench. This project requires a bit more woodworking skill, but the end result is a stunning and unique piece of furniture. First, remove the legs from the headboard and cut it in half. Then, attach some wood to the bottom of each half to create the seat and backrest of the bench. Finally, add some foam and fabric to create a cushion for the seat. You now have a beautiful and functional bench that will be the envy of all your friends.

3. Turn a Coffee Table into a Ottoman

If you have an old coffee table that you no longer use, consider turning it into an ottoman. This project requires some basic woodworking skills, but the end result is a beautiful and functional piece of furniture. First, remove the legs from the coffee table and sand it down to remove any rough spots. Then, add some foam and fabric to create a cushion for the top of the ottoman. Finally, add some legs to the bottom of the ottoman to raise it off the ground. You now have a stylish and functional ottoman that will be the centerpiece of your living room.

4. Repurpose a Bookshelf into a Bar Cart

If you have an old bookshelf that you no longer need, consider turning it into a bar cart. This project requires some basic woodworking skills, but the end result is a stylish and functional piece of furniture. First, remove any shelves that you don't need and sand the bookshelf down to remove any rough spots. Then, paint the bookshelf in the color of your choice and let it dry. Finally, add some wheels to the bottom of the bookshelf to make it easy to move around. You now have a beautiful and functional bar cart that will impress all your guests.

5. Turn an Old Door into a Table

If you have an old door lying around your home, consider turning it into a table. This project requires some basic woodworking skills, but the end result is a unique and functional piece of furniture. First, attach some legs to the bottom of the door to raise it off the ground. Then, sand the door down to remove any rough spots and add some paint or stain to give it a new look. Finally, add a glass top to the door to create a smooth surface for your new table. You now have a beautiful and functional table that will be the centerpiece of your dining room.In conclusion, upcycling old furniture is a great way to give new life to old pieces and save money while doing it. These 5 creative DIY tutorials are just a few examples of howyou can transform your old furniture into something new and unique. With a little bit of creativity and some basic woodworking skills, you can turn your old furniture into functional and stylish pieces that will impress all your friends and family.Remember, upcycling is not only good for the environment, but it also allows you to personalize your home decor and create something that is truly one-of-a-kind. Before you throw away your old furniture, consider how you can upcycle it and give it a new purpose. With these tutorials and a little bit of imagination, the possibilities are endless.