Showing posts with label diy furniture. Show all posts

Friday, November 17, 2023

Upcycling DIY Furniture: Turning Trash into Treasure

November 17, 2023 0 Comments

Upcycling DIY furniture is a great way to give new life to old discarded items while also saving money and reducing waste. Upcycling is the process of transforming unwanted materials into something new and useful. With a little creativity and some basic DIY skills, you can turn trash into treasure and create unique and stylish furniture pieces for your home.

Why Upcycling DIY Furniture is Important

Upcycling DIY furniture is important for several reasons. First, it is an environmentally-friendly way to reduce waste and keep unwanted items out of landfills. Second, it is a cost-effective way to create new furniture pieces without having to buy expensive new items. Finally, upcycling allows you to create one-of-a-kind pieces that are personalized to your taste and style.

When it comes to upcycling DIY furniture, the possibilities are endless. You can turn old wooden crates into bookshelves, transform an old door into a coffee table, or use old pallets to create a unique headboard for your bed. The key is to be creative and think outside the box.

Getting Started with Upcycling DIY Furniture

If you're interested in upcycling DIY furniture, there are a few things you'll need to get started. First, you'll need to find some items to upcycle. Look for discarded items on the side of the road, at thrift stores, or even in your own garage. Second, you'll need some basic DIY skills such as sanding, painting, and drilling. Finally, you'll need some creativity and imagination to come up with unique and functional furniture pieces.

When you're upcycling DIY furniture, it's important to keep safety in mind. Always wear protective gear such as gloves and goggles when sanding or using power tools. Make sure to follow all instructions carefully and double-check your measurements before cutting or drilling.

Tips for Upcycling DIY Furniture

If you're new to upcycling DIY furniture, here are some tips to help you get started:

  • Start small: Begin with a simple project such as upcycling an old picture frame or turning an old wooden box into a planter.
  • Choose quality items: Look for items that are well-made and sturdy, as they will be easier to upcycle and will last longer.
  • Get inspired: Look online for inspiration and ideas. There are many blogs and websites dedicated to upcycling DIY furniture.
  • Experiment with paint: Paint is an easy and affordable way to transform old furniture. Try using different colors and finishes to create a unique look.
  • Don't be afraid to ask for help: If you're not sure how to tackle a project, don't be afraid to ask for help from a friend or family member who is handy.

Conclusion

Upcycling DIY furniture is a fun and creative way to give new life to old items while also reducing waste and saving money. With a little imagination and some basic DIY skills, you can transform discarded pieces into functional and stylish furniture for your home. Start small, choose quality items, and don't be afraid to experiment with paint and other materials. With a little practice, you'll be upcycling like a pro in no time.

Thursday, November 16, 2023

Upcycling Your Furniture: How to Create a Bohemian Vibe

November 16, 2023 0 Comments
If you're looking for a way to give your home a new look without breaking the bank, upcycling your furniture is a great option. Not only is it budget-friendly, but it's also good for the environment. In this article, we'll explore how to upcycle your furniture to create a bohemian vibe.

What is Bohemian Style?

Bohemian style, also known as boho, is a popular interior design style that's all about creating a relaxed, free-spirited atmosphere. It's characterized by bold, colorful patterns, natural materials, and a mix of vintage and modern elements.

Choosing Your Furniture Pieces

When it comes to upcycling your furniture in a bohemian style, the first step is to choose the right pieces. Look for furniture with interesting shapes and textures, such as a vintage dresser or a rattan chair. Don't be afraid to mix and match different styles and eras to create a unique look.

Painting and Staining

Once you have your furniture pieces, it's time to start upcycling them. One of the easiest ways to change the look of a piece of furniture is by painting or staining it. Choose colors that are bold and vibrant, such as turquoise or mustard yellow. If you're feeling creative, try a DIY ombre effect by blending two colors together.

Adding Texture and Pattern

Bohemian style is all about texture and pattern, so don't be afraid to get creative. Add a boho-inspired rug to your living room or bedroom, or hang a macrame wall hanging above your bed. Mix and match different patterns, such as a floral pillow with a striped throw.

Accessorizing

The final step in upcycling your furniture in a bohemian style is accessorizing. Add plants, colorful pillows, and vintage decor to complete the look. Don't be afraid to mix and match different textures and materials, such as a wicker basket with a velvet throw pillow.

In Conclusion

Upcycling your furniture in a bohemian style is a fun and budget-friendly way to give your home a new look. By choosing interesting furniture pieces, painting and staining them, adding texture and pattern, and accessorizing with plants and vintage decor, you can create a relaxed and free-spirited atmosphere that's perfect for any boho lover.

Monday, November 13, 2023

DIY Furniture: Saving Money and Reducing Waste

November 13, 2023 0 Comments

Have you ever thought about creating your own furniture? DIY furniture is becoming increasingly popular as people look for ways to save money and reduce waste. Not only is it a cost-effective way to furnish your home, but it also allows you to express your creativity and make unique pieces that reflect your personal style.

Why Choose DIY Furniture?

One of the biggest advantages of DIY furniture is the cost savings. Store-bought furniture can be quite expensive, especially if you’re looking for high-quality, long-lasting pieces. By making your own furniture, you can save hundreds or even thousands of dollars. Another benefit of DIY furniture is that you have complete control over the design, materials, and overall look of the piece. You can tailor it to your specific needs and preferences, and create something that’s truly one-of-a-kind.

DIY furniture is also a great way to reduce waste. When you buy new furniture from a store, you’re often left with a lot of packaging materials that end up in the landfill. By making your own furniture, you can use reclaimed materials or repurpose items that might otherwise be thrown away. This not only helps reduce waste, but it’s also a more environmentally-friendly option.

Getting Started with DIY Furniture

If you’re new to DIY furniture, it’s important to start small and work your way up to more complex projects. There are plenty of resources available online, including tutorials, videos, and step-by-step guides that can help you get started. You can also take classes at a local community center or woodworking shop to learn new skills and techniques.

When it comes to materials, you can use a variety of different materials depending on your project and personal preferences. Some popular options include reclaimed wood, pallets, and even old furniture that’s been repurposed. You can also choose from a wide range of finishes and paints to give your furniture a unique look.

DIY Furniture Tips and Tricks

Here are a few tips to keep in mind as you embark on your DIY furniture journey:

  • Invest in quality tools: While you can certainly make do with basic tools, investing in high-quality tools can make your projects easier and more enjoyable.
  • Measure twice, cut once: This old adage is especially important when it comes to DIY furniture. Always double-check your measurements before making any cuts.
  • Be patient: DIY furniture takes time and patience. Don’t rush the process, and take breaks when you need to.
  • Don’t be afraid to ask for help: If you’re stuck or unsure about something, don’t hesitate to ask for help from a friend or professional.

In Conclusion

DIY furniture is a fun and rewarding way to save money and reduce waste. With a little bit of creativity and some basic tools, you can create beautiful and unique pieces that will last for years to come. Whether you’re a seasoned DIYer or just starting out, there’s never been a better time to start making your own furniture.

Saturday, November 11, 2023

DIY Furniture Hacks: Simple Ways to Update Your Home Decor

November 11, 2023 0 Comments

Introduction

Are you tired of looking at the same old furniture in your home? Do you want to update your home decor without breaking the bank? Well, you're in luck! With a few simple DIY furniture hacks, you can transform your old furniture into stylish and modern pieces that will breathe new life into your home.
Paint It Up

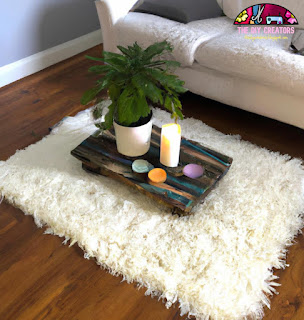
One of the easiest ways to update your furniture is by giving it a fresh coat of paint. Whether it's a dresser, coffee table, or dining room chairs, a new color can completely transform the look of your furniture. Choose a color that complements your existing decor or go bold with a vibrant hue. Don't be afraid to experiment with different techniques like distressing or color blocking for a unique and personalized look.

Switch Up the Hardware

Another simple DIY furniture hack is to switch up the hardware on your furniture. Replace old knobs and pulls with stylish new ones to give your furniture a fresh and modern look. You can find a wide variety of hardware options at your local hardware store or online. Choose a finish that complements your decor or go with something bold and unique.

Reupholster Your Furniture

If you have old furniture with worn or outdated upholstery, consider reupholstering it for a fresh new look. You can choose from a variety of fabrics and patterns to match your decor and personal style. Reupholstering can be a bit more challenging than the other DIY furniture hacks, but with a little patience and some basic sewing skills, you can transform your old furniture into something new and stylish.

Add Some Decorative Accents

Another easy DIY furniture hack is to add some decorative accents to your furniture. For example, you can add some decorative trim to the edges of a dresser or coffee table for a touch of elegance. You can also add some decorative stenciling or decoupage to the surface of your furniture for a unique and personalized look.

Conclusion

Updating your home decor doesn't have to be expensive or complicated. With a few simple DIY furniture hacks, you can transform your old furniture into stylish and modern pieces that will breathe new life into your home. So, grab some paint, new hardware, or fabric and get to work! Your home will thank you.

Thursday, November 9, 2023

DIY Furniture: Tips for Adding Storage to Your Living Space

November 09, 2023 0 Comments
Living spaces are not only places where people relax, but they also serve as storage spaces for various items. However, space can be limited, especially in small apartments. This is where DIY furniture solutions come in handy. With a little creativity and resourcefulness, you can add storage to your living space without breaking the bank. Here are some tips to get you started.

1. Use Wall Space

One of the easiest ways to add storage to your living space is to use your walls. Shelves, hooks, and baskets can all be used to store items without taking up valuable floor space. You can even build your own shelves using simple materials like wood planks and brackets. This not only adds storage but also adds a unique touch to your living space.

2. Repurpose Old Furniture

Before you throw out that old dresser or bookshelf, consider giving it new life by repurposing it. Sand it down, paint it, and add new hardware to create a unique piece that fits your living space perfectly. You can also add baskets or bins to the shelves to create even more storage space.

3. Build Your Own Storage Ottoman

An ottoman is not only a great place to rest your feet, but it can also be used for storage. You can build your own storage ottoman using plywood, foam, fabric, and a few other materials. This is a great DIY furniture project that adds both storage and style to your living space.

4. Create a Sofa Table with Storage

A sofa table is a great way to add storage to your living space, especially if you have a sofa that sits against a wall. You can build your own sofa table using wood planks and brackets, or repurpose an old console table. Add baskets or bins underneath for even more storage space.

5. Use the Space Under Your Bed

The space under your bed is a great place to store items that you don't use on a daily basis. You can use storage containers, baskets, or even build your own under-bed storage drawers. This is a great way to free up space in your closet or dresser.In conclusion, adding storage to your living space doesn't have to be expensive or complicated. With a little creativity and DIY furniture solutions, you can create a unique and functional space that meets all of your storage needs.

Monday, November 6, 2023

How to Build a Rustic Farmhouse Dining Table from Scratch

November 06, 2023 0 Comments
If you are looking to add some rustic charm to your dining room, building a farmhouse-style table from scratch is a great project to take on. Not only will you have a unique piece of furniture, but you can also customize it to fit your specific needs and preferences. Here's a step-by-step guide on how to build a rustic farmhouse dining table from scratch.

Step 1: Gather Materials

The first step in building any piece of furniture is to gather your materials. For this project, you will need:- Pine boards for the tabletop and legs- 1x4 boards for the apron- Wood glue- Wood screws- Sandpaper- Stain or paint- Polyurethane

Step 2: Cut Wood to Size

Once you have all of your materials, it's time to start cutting. Cut your pine boards to the desired length and width for your tabletop. Cut your legs to the desired height, and cut your 1x4 boards to the length of each side of the tabletop for the apron.

Step 3: Assemble the Tabletop

Now it's time to assemble the tabletop. Lay out your pine boards and arrange them in the pattern you desire. Apply wood glue to the edges of each board and clamp them together. Once the glue has dried, sand the tabletop to smooth out any rough edges.

Step 4: Attach the Apron

The apron is what connects the legs to the tabletop. Using wood glue and wood screws, attach the 1x4 boards to the underside of the tabletop, flush with the edges. Then, attach the legs to the apron using wood glue and wood screws.

Step 5: Stain or Paint the Table

Now it's time to add some color to your table. Apply your desired stain or paint to the tabletop and legs, and let it dry completely. Once the stain or paint has dried, apply a coat of polyurethane to protect the wood from scratches and spills.

Step 6: Enjoy Your New Table

After the polyurethane has dried, your new rustic farmhouse dining table is ready to use. Gather your family and friends around it for a cozy and charming dinner party.Building a rustic farmhouse dining table from scratch may seem like a daunting task, but with some patience and attention to detail, it can be a fun and rewarding project. And the best part? You'll have a beautiful and unique piece of furniture that you can enjoy for years to come.

Sunday, October 29, 2023

Rustic DIY Furniture: Creating a Cozy and Charming Home

October 29, 2023 0 Comments
Are you tired of boring, generic furniture that lacks character and charm? Creating your own rustic DIY furniture can add a cozy and personal touch to your home decor. Not only is it cost-effective, but it also allows you to express your creativity and show off your unique style.

Benefits of Rustic DIY Furniture

Rustic DIY furniture is all about using natural materials and textures. This style is warm, inviting, and perfect for creating a cozy atmosphere in your home. Here are some benefits of creating rustic DIY furniture:
  • Cost-effective: Creating your own furniture can save you money compared to buying pre-made pieces.
  • Personalized: You can customize your furniture to fit your specific needs and style.
  • Unique: Rustic DIY furniture is one-of-a-kind and adds character to your home.
  • Environmentally friendly: By using natural materials, you can reduce your carbon footprint and contribute to a more sustainable lifestyle.

DIY Rustic Furniture Ideas

There are many different types of rustic DIY furniture you can create. Here are a few ideas to get you started:

1. Pallet Furniture

Pallets are a great resource for creating rustic furniture. You can easily transform them into coffee tables, bookshelves, or even a bed frame. The raw wood and natural texture of the pallets add a charming touch to any room.

2. Repurposed Wood Furniture

Old barn wood or salvaged wood can be transformed into beautiful rustic furniture. You can create a dining table, benches, or even a headboard. The weathered and distressed look of the wood adds character and warmth to any space.

3. Branch Furniture

If you love the outdoors, branch furniture may be just what you need. You can create a unique and rustic headboard, coffee table, or even a coat rack. The natural texture and shape of the branches add a touch of whimsy to any room.

4. Mason Jar Lighting

Mason jars can be transformed into beautiful lighting fixtures. By adding a simple light kit, you can create a unique and rustic pendant light or even a chandelier. The warm glow of the light adds a cozy and inviting atmosphere to any room.

5. Rustic Shelving

Rustic shelving adds a charming touch to any room. You can create floating shelves using salvaged wood or even repurpose old wooden crates. The natural texture and warmth of the wood add character and charm to any space.

Tips for Creating Rustic DIY Furniture

Creating rustic DIY furniture takes time and effort, but the end result is worth it. Here are a few tips to keep in mind:
  • Use natural materials: Stick to natural materials like wood, metal, and stone to create a rustic look.
  • Embrace imperfections: Rustic furniture is all about imperfections and natural textures. Don't worry about making everything perfect.
  • Experiment with finishes: You can add character to your furniture by experimenting with different finishes like distressing or whitewashing.
  • Be patient: Creating rustic DIY furniture takes time and effort. Don't rush the process and enjoy the creative journey.

In Conclusion

Creating your own rustic DIY furniture is a fun and rewarding experience. It allows you to express your creativity and add a personal touch to your home decor. Whether you're repurposing old materials or starting from scratch, the end result is a cozy and charming space that reflects your unique style.

Saturday, October 28, 2023

10 DIY Furniture Projects to Transform Your Living Space

October 28, 2023 0 Comments
If you're looking for ways to spruce up your living space without breaking the bank, then DIY furniture projects might just be the solution you need. Not only are these projects affordable, but they also give you the opportunity to put your creative skills to the test. In this article, we'll be sharing 10 DIY furniture projects that you can do to transform your living space.

1. Pallet Coffee Table

One of the simplest DIY furniture projects is creating a coffee table out of pallets. All you need is a pallet, some sandpaper, and a bit of paint or stain. Sand the pallet down to smooth out any rough edges, then paint or stain it to your desired color. You can add caster wheels to make it movable, and voila, you have a trendy coffee table!

2. Bookshelf From Crates

Another simple DIY furniture project is to transform wooden crates into a bookshelf. You can find these crates at craft stores, flea markets, or even online. All you need to do is sand them down, paint or stain them, and then stack them up. You can even add casters to make it mobile.

3. Reclaimed Wood Headboard

A reclaimed wood headboard can add a touch of rustic charm to your bedroom. You can use recycled wood from old furniture or buy reclaimed wood from a lumber store. Sand the wood down and then cut it into the desired shape and size. You can then paint or stain it to match your bedroom decor.

4. Ottoman From Old Tires

An ottoman made from old tires is a creative way to repurpose items that would otherwise be thrown away. All you need is an old tire, some foam, and fabric. Cut the foam to fit the size of the tire, then cover it with the fabric and staple it to the underside of the tire. You can then add legs to the ottoman or leave it as is.

5. Upcycled Dresser

An upcycled dresser can give your bedroom a fresh new look. Start by removing the drawers and sanding down the dresser. You can then paint or stain it to match your decor. Replace the old knobs with new ones to complete the transformation.

6. Hanging Rope Shelves

Hanging rope shelves are a unique way to display your decor items. All you need are wooden boards, rope, and hooks. Drill holes into the boards and thread the rope through them, securing the ends with knots. Hang the shelves with hooks and display your items.

7. Vintage Suitcase Nightstand

A vintage suitcase can be transformed into a unique nightstand. Simply clean the suitcase, add legs to it, and then place it next to your bed. You can also add a glass top to make it more functional.

8. Wooden Crate End Table

A wooden crate can be turned into an end table with a bit of creativity. Sand the crate down and then paint or stain it to match your decor. Add caster wheels to make it mobile, and it's ready to use.

9. Macrame Hammock Chair

A macrame hammock chair is a unique and comfortable addition to any living space. You can create one by using a sturdy wooden dowel, macrame rope, and a cushion. Follow a macrame tutorial to create the woven seat and then attach it to the wooden dowel. Hang the chair from the ceiling using strong ropes or chains.

10. Floating Shelves

Floating shelves are a great way to display your decor items without taking up too much space. You can create them by using wooden boards and brackets. Drill holes into the boards and then attach the brackets. Mount the shelves on the wall and display your items.In conclusion, DIY furniture projects can be a fun and affordable way to transform your living space. From pallet coffee tables to macrame hammock chairs, there are endless possibilities for creative and unique furniture pieces. Give these 10 projects a try and see how they can elevate your home decor.

Wednesday, October 25, 2023

DIY Furniture for Small Spaces: Maximize Your Space with These Clever Ideas

October 25, 2023 0 Comments
Living in a small space can be challenging, especially when it comes to furniture. You want to have pieces that are functional, stylish, and don't take up too much space. That's where DIY furniture comes in. With a little creativity and some basic tools, you can create furniture that maximizes your space and fits your unique style. Here are some clever DIY furniture ideas to get you started.

1. Wall-Mounted Desk

A wall-mounted desk is a great way to create a workspace in a small room. It takes up minimal floor space and can be easily folded up when not in use. To make one, all you need is a sturdy piece of wood, brackets, and screws. Simply attach the brackets to the wall and the wood to the brackets. You can customize the desk by painting or staining the wood to match your decor.

2. Storage Ottoman

A storage ottoman is a versatile piece of furniture that can be used as a footrest, extra seating, or storage. To make one, you'll need a wooden crate, foam padding, fabric, and a staple gun. Cut the foam padding to fit the top of the crate and cover it with the fabric, stapling it to the underside of the lid. Then attach the lid to the crate with hinges. You can customize the ottoman by painting or staining the crate to match your decor.

3. Hanging Shelves

Hanging shelves are a great way to add storage to a small room without taking up floor space. To make them, you'll need wooden boards, rope, and hooks. Cut the boards to the desired length and attach the rope to each end, tying knots to hold them in place. Then attach the hooks to the ceiling and hang the shelves from them. You can customize the shelves by painting or staining the wood to match your decor.

4. Murphy Bed

A Murphy bed is a space-saving solution that allows you to have a bed in a small room without taking up too much space. To make one, you'll need a bed frame, hinges, and a locking mechanism. Attach the hinges to the bed frame and the wall, allowing it to fold up when not in use. Then add the locking mechanism to keep it secure. You can customize the bed frame by painting or staining it to match your decor.

5. Corner Shelves

Corner shelves are a great way to utilize space that would otherwise be wasted. To make them, you'll need wooden boards, brackets, and screws. Cut the boards to the desired length and attach the brackets to the wall and the boards to the brackets. You can customize the shelves by painting or staining the wood to match your decor.With these DIY furniture ideas, you can maximize your space and create furniture that fits your unique style. Whether you're looking to create a workspace, add storage, or have a bed in a small room, these projects are easy and fun to make. So grab your tools and get started on your next DIY furniture project!

Monday, October 23, 2023

DIY Furniture Ideas for Kids' Rooms: Cute and Functional Designs

October 23, 2023 0 Comments
Decorating a kid's bedroom can be both exciting and challenging. Parents want to create a space that is not only fun and playful but also functional and safe. One way to achieve this is by incorporating DIY furniture that is both cute and practical. In this article, we will explore some creative DIY furniture ideas for kids' rooms that will help you design a space that your child will love.

1. Playful Toy Chests

Toy chests are a must-have in any kid's room. Not only do they provide ample storage for toys and games, but they also add a fun element to the decor. A great DIY idea is to turn an ordinary wooden chest into a whimsical toy chest. You can paint it in bright colors, add decals, or even stencil your child's name on it. For a more playful look, consider adding wheels to the chest to make it mobile.

2. DIY Bookshelves

Encouraging children to read is an important aspect of their development. Adding bookshelves to their room is a great way to make books easily accessible and to instill a love of reading. A DIY bookshelf can be made using simple materials like wooden planks and brackets. Paint the shelves in your child's favorite colors or patterns to add a pop of color to the room.

3. Creative Bed Frames

A bed is the centerpiece of any bedroom, and a creative bed frame can add character and charm to your child's room. A DIY bed frame can be made using old pallets, which can be sanded down and painted in bright colors. You can also add fun elements like a slide or a tent to create a playful and imaginative space for your child.

4. Customized Desks

A desk is an essential piece of furniture for older children who need a space to study and do homework. A customized desk can be made using an old door and two filing cabinets. Simply attach the filing cabinets to either side of the door, and you have a sturdy and spacious desk. Paint the desk to match the room's decor and add a fun chair to complete the look.

5. Upcycled Storage Solutions

Storage is always a concern in a child's room, but you can create unique and functional storage solutions using items you already have around the house. For example, an old ladder can be turned into a bookshelf or a shoe rack. A wooden crate can be hung on the wall to hold toys or stuffed animals. The possibilities are endless, so get creative and repurpose items that might otherwise go to waste.In conclusion, designing a kid's room can be a fun and rewarding experience, especially when you incorporate DIY furniture ideas. These ideas are not only cute and playful but also functional and practical. From toy chests to customized desks, the possibilities are endless. So get creative and make your child's room a space that they will love and cherish.

Thursday, October 19, 2023

DIY Furniture: The Do's and Don'ts for a Successful Project

October 19, 2023 0 Comments
Creating your own furniture can be a satisfying and cost-effective way to outfit your home with unique pieces that reflect your personal style. However, it's important to approach these projects with caution to avoid costly mistakes and ensure a successful outcome. To help you get the most out of your DIY furniture projects, here are some do's and don'ts to keep in mind.

Do plan your project carefully

Before you even begin your project, take the time to plan out every detail. This includes choosing the right materials, measuring your space, and creating a detailed sketch or blueprint of your design. This will help you avoid mistakes, prevent waste, and ensure that the finished product fits perfectly in your home.

Don't skimp on materials

While it may be tempting to save money by using cheaper materials, this can actually end up costing you more in the long run. Cheaper materials may not hold up as well over time, and you may end up having to replace your furniture sooner than you would like. Invest in high-quality materials to create a piece that will last for years to come.

Do use the right tools

Using the right tools is essential for a successful DIY furniture project. Make sure you have all the necessary tools on hand before you begin, and take the time to learn how to use them properly. This will help you achieve a more professional-looking finish and prevent accidents or injury.

Don't rush the process

Creating furniture takes time and patience, so don't rush the process. Take breaks when you need to, and don't try to cut corners to finish the project more quickly. Rushing can lead to mistakes and can compromise the quality of your finished piece.

Do test your design before you build

Before you start building your piece, it's a good idea to create a prototype or test version. This will allow you to see how the finished product will look and function, and can help you identify any potential issues or design flaws before you invest time and money into building the real thing.

Don't be afraid to ask for help

If you're new to DIY furniture projects, don't be afraid to ask for help. Reach out to friends or family members with experience, or consider taking a class or workshop to learn new skills. You can also find a wealth of information and tutorials online to help you along the way.

Do take safety seriously

Finally, it's important to take safety seriously when working on any DIY project. Wear appropriate safety gear, such as goggles and gloves, and make sure your workspace is well-ventilated. Take breaks when you need to, and don't work when you're feeling fatigued or distracted.By following these do's and don'ts, you can create beautiful and functional furniture for your home that you can be proud of. Just remember to take your time, use high-quality materials, and prioritize safety throughout the process.

Tuesday, October 17, 2023

Repurpose Your Old Pallets: 5 DIY Furniture Ideas

October 17, 2023 0 Comments
If you have a bunch of old pallets lying around your house, don't throw them away just yet. With a little creativity and DIY skills, you can repurpose those old pallets into beautiful and functional furniture pieces. Not only will you save money, but you'll also be doing your part in reducing waste and helping the environment. In this article, we'll share 5 DIY furniture ideas that you can make using old pallets.

1. Pallet Bed Frame

Transform your bedroom with a rustic and elegant pallet bed frame. Start by cleaning and sanding the pallets to remove any rough edges or splinters. Next, stack the pallets on top of each other to create the desired height and size for your bed frame. Secure the pallets together using screws and add a headboard made of pallets as well. Finish the look with a coat of paint or stain to match your room's decor.

2. Pallet Coffee Table

A pallet coffee table is a functional and stylish addition to your living room. Simply stack two pallets on top of each other and secure them together using screws. Add four castor wheels to the bottom for easy mobility. You can also paint or stain the pallets to match your living room's color scheme.

3. Pallet Bookshelf

If you're looking for a unique way to display your books, a pallet bookshelf is the way to go. Start by disassembling the pallets and removing the nails. Cut the pallet planks to the desired length and width. Attach the planks to the wall using screws and brackets. You can also paint or stain the pallet planks to match your room's decor.

4. Pallet Garden Bench

Make your garden more inviting with a cozy pallet garden bench. Start by sanding and cleaning the pallets. Cut the pallets to the desired length and stack them on top of each other to create the bench's seat and backrest. Secure the pallets together using screws and add legs made of pallets as well. Finish the look with a coat of paint or stain to protect the bench from the elements.

5. Pallet Wine Rack

A pallet wine rack is a chic and functional addition to any kitchen or dining room. Start by cleaning and sanding the pallets. Cut the pallets to the desired length and width. Add shelves by securing the planks to the pallets using screws. You can also add a wine glass holder made of pallets underneath the shelves. Finish the look with a coat of paint or stain to match your kitchen or dining room's decor.Repurposing old pallets into furniture pieces is not only environmentally friendly but also a fun and creative way to decorate your home. With these DIY furniture ideas, you can transform your old pallets into beautiful and functional pieces that you'll be proud to show off.